
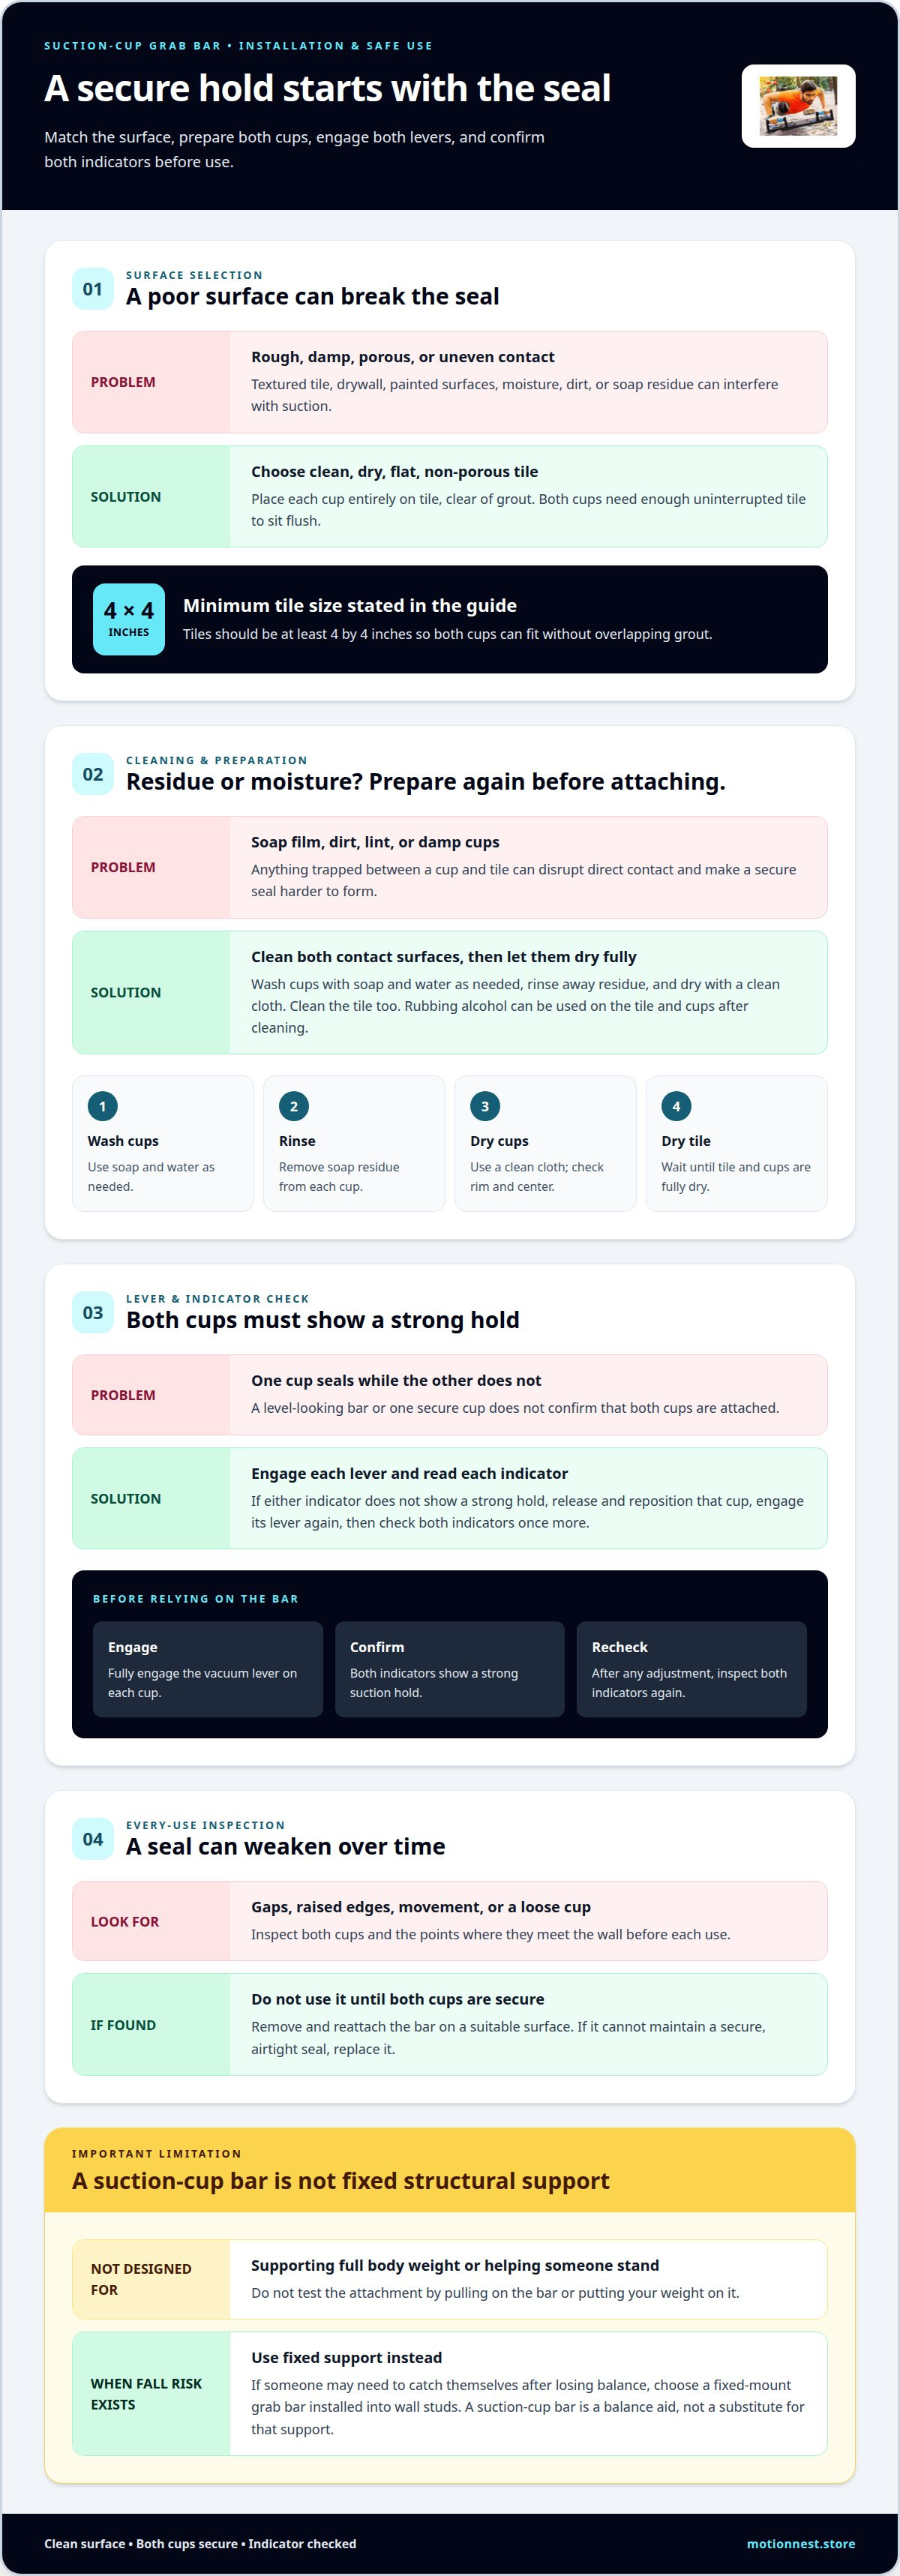
A suction-cup grab bar is only as dependable as its seal. To learn how to install a suction cup grab bar correctly, choose clean, dry, flat, non-porous tile, with each cup fully on the tile and clear of grout; tiles should be at least 4 by 4 inches. Engage the vacuum levers and make sure the safety indicator shows a secure hold before use. These bars aren't designed to support full body weight.
Before relying on a grab bar, take a moment to check the surface and attachment. A clean installation and a clear indicator help show whether the cups have sealed, while understanding the bar’s limits helps you use it appropriately. This guide covers preparing the tile and cups, positioning the bar, engaging the levers, reading the indicator, and recognizing when a suction-cup bar isn’t the right support.
Key Takeaways
- Check that both suction cups feel secure before each use, and reattach the bar if either one loosens.
- Clean the tile and cups, then dry them thoroughly so dirt, soap residue, or moisture won’t interfere with the seal.
- Engage the vacuum levers and use the safety indicator to confirm the cups have created a strong hold.
- Use the bar only on suitable smooth surfaces, and remember it isn’t designed to support full body weight or help you stand.
1. Are Suction Cup Grab Bars Safe?
A suction-cup grab bar is secure only while both cups hold firmly against the wall. Check the attachment before every use because suction can weaken over time. If either cup looks loose, shifts, or loses its seal, remove and reattach the bar. Don’t use it until both cups are firmly in place.
Compatible surfaces are clean, dry, flat, and non-porous, such as suitable bathroom tile. Each suction cup must sit entirely on tile, without crossing a grout line. Tile should measure at least 4 inches by 4 inches so both cups can fit without overlapping grout. Textured tile, drywall, and painted surfaces aren’t suitable for suction-cup installation.
Before each use, inspect both cups and the points where they meet the wall. Look for gaps, a raised edge, or movement that could mean the seal has weakened. If you spot any of these signs, remove the bar and reinstall it on a suitable surface. Don’t use a bar that feels loose, even if the other cup seems secure.
- Confirm both cups are fully on tile, not partly over grout.
- Look for gaps or lifted edges around either cup.
- Remove and reattach the bar if a cup shifts or feels loose.
Both cups should sit flush against the tile and stay firmly in place. If the model has a safety indicator, check it after engaging the vacuum lever to see whether strong suction has been achieved. Even a secure seal has limits: suction-cup bars aren’t designed to support full body weight or provide leverage when standing from a seated position. Use one as a balance aid, not as a substitute for fixed support when there’s a risk of falling.
2. Cleaning and drying suction cups
Start with a clean surface and clean cups. Dust, dirt, and soap scum between a suction cup and the tile can interfere with contact. Wipe away visible residue before installation. Attach suction cups only to clean, dry, flat, non-porous surfaces. Damp or uneven areas can make it harder to form a secure seal.
Clean the tile, especially the areas beneath the cups. After removing dirt and soap scum, you can wipe the tile and cups with rubbing alcohol before installation. Let everything dry fully. Don’t leave cleaner, water, or loose fibers behind, as anything trapped under a cup can disrupt contact with the tile.
- Wash the suction cups with soap and water as needed.
- Rinse away soap residue from each cup.
- Dry the cups thoroughly with a clean cloth.
- Clean the tile, then allow both tile and cups to dry before attaching the bar.
After drying, inspect each cup closely. Check the rim and center for residue, lint, or moisture. If a cup still feels damp, let it dry longer instead of pressing it against the wall. Clean, dry cups help make direct contact with clean, dry tile.
Keep cleaning simple. Wash the cups with soap and water as needed, then dry them thoroughly. You can also use rubbing alcohol on the tile and cups after cleaning the tile. Don’t install the bar while either surface is wet.
For example, if showering leaves soap film on the tile, clean the area before placing the cups. If a cup picks up dust while you handle it, wash and dry it again. These steps prepare the surfaces for the vacuum lever and indicator checks.
3. Engaging the vacuum lever and safety indicator
After positioning the bar, engage the vacuum lever on each cup, following its design until each lever is fully engaged. The safety indicator shows whether strong suction has been achieved. Check it after engaging the lever instead of assuming the bar is secure because it looks level.
If you're learning how to install suction cup grab bar correctly, check the indicator on both cups before use. If either one doesn’t show a strong hold, don’t use the bar. Release the lever, reposition that cup, and engage it again. Then check the indicator once more. A secure seal on one cup doesn’t mean the other has sealed.
Use this check after installation:
- Engage the vacuum lever on each cup.
- Read each safety indicator and confirm both show a strong suction hold.
- If an indicator doesn’t show a strong hold, release and reset that cup.
- Recheck both indicators before relying on the bar.
For example, one cup may seal while the other fails to hold. That means the installation is incomplete, even if the bar looks steady. Reset the cup without a strong indicator, then check both cups again. Don’t skip the second check after adjusting the bar.
The indicator helps you check the installation, but it doesn’t replace regular inspections. Suction can weaken over time, so check the attachment before each use. If a cup becomes loose, remove and reattach the bar. After resetting it, engage the levers and check the indicators again.
Keep the indicator visible as you install the bar. If your hand or the bar blocks it, change your viewing angle rather than guessing. To understand how to install suction cup grab bar correctly, rely on a clear indicator reading, not appearance alone. Follow the lever design, and don’t treat an unclear or weak reading as proof of secure attachment.
4. Limitations and fall-prevention precautions
Suction-cup bars suit some situations, but they aren’t fixed structural supports. They aren’t designed to bear full body weight or help someone stand from a seated position. If someone needs support to prevent a fall after losing balance, use a fixed-mount grab bar installed into wall studs.
There’s no weight figure or testing method to use here. Don’t rely on the bar to support full body weight, and don’t test its attachment by pulling on it or putting your weight on it. Instead, follow the installation steps and use the safety indicator to assess whether strong suction has been achieved.
Let the surface and the user’s support needs guide your choice. A suction attachment relies on maintaining an airtight seal, while a fixed mount connects to wall studs. If someone may need to catch themselves after losing balance, choose fixed support rather than relying on suction cups.
Replace a suction-cup bar if it can’t maintain a secure, airtight seal. Replace it immediately if either cup is damaged or deteriorated. Prolonged sunlight and freezing temperatures can reduce cup elasticity, so inspect the cups after exposure to either condition.
- Stop using the bar if a cup is damaged or no longer seals securely.
- Choose fixed mounting into wall studs when support is needed to prevent a fall.
- Keep suction cups away from prolonged sunlight and freezing temperatures.
A cup may look intact but still fail to hold an airtight seal. If resetting the bar doesn’t restore a secure seal, replace it rather than relying on it. Don’t use a suction-cup bar as a substitute for fixed support when someone needs help recovering balance or rising from a seat. Match the support to the task and use the bar within its intended limits.
For bathroom support suited to everyday routines, explore practical home safety options.
Motion Nest: Bathroom Handrail With Vacuum Sucker For Safety Support
Motion Nest offers the Bathroom Handrail With Vacuum Sucker For Safety Support for readers considering a suction-cup bathroom support. The installation steps in this guide can help you assess whether the wall surface and your support needs suit this type of handrail. It relies on suction, so it isn’t a replacement for a fixed grab bar mounted into wall studs when someone needs support to prevent a fall after losing balance. Use the guidance above to understand the product’s intended limits, prepare an appropriate surface, and check its attachment before use. If suction support fits your bathroom routine, explore this option as a practical home product. Visit motionnest.store to view the handrail.
Make your bathroom support part of a thoughtful routine
Choosing bathroom support is a personal decision. Consider which movements feel less steady, what surface is available, and whether a suction-mounted option provides the support needed. Planning ahead can help you choose an arrangement that fits your routine, rather than relying on a grab bar for a task it isn’t designed to handle.
Knowing how to install a suction cup grab bar correctly is a practical starting point for deciding whether this style suits your space. Review the product details and intended use before adding it to your routine. If a suction-cup handrail meets your needs, Motion Nest offers the Bathroom Handrail With Vacuum Sucker For Safety Support.
For a closer look at this home support option, visit Motion Nest. Choose the setup that helps you feel prepared for everyday routines.
Frequently Asked Questions
Are Suction Cup Grab Bars Safe?
Suction-cup bars can provide support when attached securely to a suitable surface and used within their limits. Think of one as an aid for steadying yourself, not as something to catch your full weight if you slip. If someone needs dependable help recovering balance, a fixed grab bar mounted into wall studs is the appropriate support.
How do you prepare and clean a surface before installing a suction cup grab bar?
Remove dirt and soap residue, then make sure the tile and cups are dry before installation. Wash the cups with soap and water as needed, rinse, and dry them thoroughly. After cleaning the tile, you can also use rubbing alcohol on the tile and cups. Don’t install the bar on a damp surface or across grout lines.
How often should you check or reattach a suction cup grab bar?
Check the bar before every use. Look for a cup that has lifted, shifted, or lost its seal. If it feels loose, remove and reattach it before relying on it. A bar that held firmly earlier may no longer be secure when you use it again, so don’t skip this hands-on check.
Can suction cup grab bars support body weight or prevent falls?
No. Suction-cup bars aren’t intended to support full body weight or provide leverage when standing from a seated position. If someone needs support to prevent a fall after losing balance, use a fixed-mount grab bar secured into wall studs instead. Choose support based on the movement involved, not as though a suction attachment were a weight-bearing fixture.
What are the risks of using a suction cup grab bar in a shower or bathtub?
The main risk is relying on a bar that isn’t securely attached or using it to bear body weight. Install it only on a clean, dry, flat, non-porous surface, and don’t attach it while the tile or cups are wet. Check the attachment before each use, and stop using the bar if a cup shifts or loses its seal.